Showing posts with label recipes. Show all posts

Sunday, September 16, 2012

Perfect Berry-Almond Smoothie for One

I make the best berry almond smoothie.


It's very tasty, perfectly frosty, and it's full of protein and nutrients. 

In other words: 

{ It'll get you through a good chunk of your day. }

You'll need:
  • 1 individual serving of yogurt (I get the Activia because Josh says it has good stomach bugs.)
  • 1 generous spoonful of almond butter
  • milk
  • a generous amount of frozen mixed berries (I like strawberries + blueberries + raspberries.)
  • sugar


You want the yogurt to be partially frozen.
To achieve the desired effect, set the yogurt cup in the freezer overnight. The next morning, set the yogurt out on the counter while you're exercising. (Or chasing your kids around or putting on your make-up or whatever.) 30 minutes to an hour.

*** Note: Josh says that I might be killing the good bugs by freezing the yogurt. 


When you set out the yogurt, you also want to set out the strawberries (but not the other berries), so that they aren't just giant chunks of frozen-solidness. 


When you're ready to make the smoothie, plop the frosty yogurt into the blender first. Then add the almond butter. 

You want the almond butter to land on top of the yogurt. You don't want it to fall down underneath the blades, or you won't get all of it in your smoothie.

Splash in some milk and blend until incorporated.

Then grab your berries (frozen solid little berries + slightly thawed big berries) and throw them in, along with 1 to 1 1/2 teaspoons of sugar. Blend that, add more milk if necessary, and you're done

You want the consistency to be just thin enough to pour into a glass and drink through a straw. No thinner.


This baby will give you the good energy you need to get your day up and moving. You'll be satiated for hours.

Hope you enjoy!

~

Recipe inspired by this.
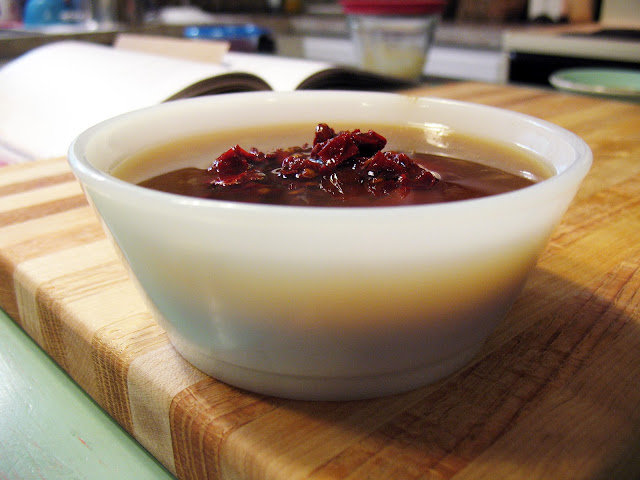
Restaurant ware berry bowl available here.
Similar amber glass tumblers (only taller) available here.

Sunday, June 17, 2012

Ingredient of the Week: Marshmallows

I picked this one!

I made green jello salad. 

I used to die for this when my Aunt Anne made it and I was fortunate enough to be there.


So sinfully good. It actually doesn't contain any jello. The green stuff is pistachio pudding mix.

A fun retro bowl for a fun retro recipe.

I am currently into faux cut glass. {The bowl is plastic in case you can't tell.} 

~

Green Jello Salad
 
1 box pistachio pudding
 mix
1 carton cool whip 

1 can crushed pineapple, drained

1-2 cups mini marshmallows

 
Mix pistachio pudding mix with cool whip. Stir until it all turns green. Add pineapple and marshmallows.  Stir and then chill. Serve chilled.

Saturday, June 2, 2012

Buttermilk Coffee Cake

My first coffee cake!

Josh says he likes coffee cake. I wonder what he will think of this one. It's a pretty basic recipe from the Better Homes & Gardens New Cookbook.
   
Not bad.

 
Serve on 1950's dishes with coffee, and enjoy!

~

Buttermilk Coffee Cake
from The Better Homes & Gardens New Cookbook, 12th Edition

2 1/2 cups flour
1 1/2 cups (330 grams) packed brown sugar
1/2 teaspoon salt
2/3 cup (10 2/3 tablespoons) butter
2 teaspoons baking powder
1/2 teaspoon baking soda
1/2 teaspoon cinnamon
1/2 teaspoon nutmeg
2 beaten eggs
1 1/3 cups buttermilk
1/2 cup chopped nuts

  • Grease bottom and 1/2 inch up sides of a 13x9x2-inch baking pan; set aside. In a large bowl combine flour, brown sugar, and salt. Cut in butter until mixture resembles coarse crumbs; set aside 1/2 cup. Stir baking powder, baking soda, cinnamon, and nutmeg into remaining crumb mixture.
  • In another bowl combine eggs and buttermilk. Add egg mixture all at once to flour mixture. Spoon batter into prepared pan. Combine reserved crumb mixture and nuts; sprinkle over batter.
  • Bake in a 350° oven for 35 to 40 minutes or until a wooden toothpick inserted near the center comes out clean. Serve warm.

Yield: 18 servings 

Calorie Content: 225 calories per serving, or 3.37 calories per gram

Monday, May 21, 2012

Olive Rosemary Loaves

3 or 4 years ago (?) I checked an Italian cookbook out from the library and copied a few recipes out of it, including a recipe for "olive rosemary loaves." Today I made them for the first time, and OMG they taste just like that bread they bring you at Macaroni Grill! Only kinda better, because they have olive pieces in them, which is quite nice. 

First rise.

Second rise, brushed with olive oil, slit with a serrated knife.

I think a crow must have got hold of this one.

So supper came together quite nicely. Olive rosemary bread dipped in cracked pepper and olive oil (a la  Macaroni Grill), spaghetti tossed with some sun-dried tomato pesto I had left over from another thing, and a simple salad with Mary's salad dressing. 

I was needing a simple salad. I made mine huge.

{ quote of the day }

ME AT THE DINNER TABLE: "It's like we're at Macaroni Grill, only we have control over the pepper mill!"

~

Olive Rosemary Loaves

1 1/2 cup warm water (105-115° F)
4 Tablespoons olive oil, plus more for oiling your baking sheet
2 packages (4 1/2 teaspoons) active dry yeast
1 Tablespoon sugar
1 cup kalamata olives, pitted and chopped
2 Tablespoons finely chopped fresh rosemary
2 teaspoons salt
5 cups (680 grams) bread flour 

  • In a large bowl, combine 1/2 cup warm water, 3 Tablespoons of the olive oil, yeast, and sugar; stir to dissolve. Let stand until foamy, about 5 minutes. Stir in remaining 1 cup warm water, olives, rosemary, salt, and 4 cups (544 grams) flour until combined.
  • Turn dough onto a lightly floured surface and knead until smooth and elastic, about 8 minutes, working in enough of the remaining flour (136 grams) just to keep dough from sticking.
  • Shape dough into a ball; place in a greased large bowl, turning dough to grease top. Cover bowl and let dough rise in a warm place until doubled in volume, about 1 hour.
  • Punch down dough. Turn dough onto a lightly floured surface and cut in half; cover and let rest 15 minutes for easier shaping. Grease a large cookie sheet.
  • Shape each dough half into a 7.5 x 4" oval; place 3" apart on prepared cookie sheet. Cover and let rise in a warm place until doubled, about 1 hour.
  • Meanwhile, preheat oven to 400° F. Brush tops of loaves with remaining 1 Tablespoon oil. With a serrated knife, cut three diagonal slashes across the top of each loaf. Bake until loaves are golden and have reached an internal temperature of 200° F or so, about 30 minutes. Cool on wire rack.

Wednesday, May 2, 2012

Coffee-Chipotle Oven Brisket

I have fallen a little behind with my cooking group. Last week's ingredient was coffee; yesterday I finally got around to making Coffee-Chipotle Oven Brisket from The Homesick Texan Cookbook.

It was a marathon cooking day. I made brisket, barbeque sauce, potato salad, coleslaw, and Pioneer Woman dinner rolls. I started out fresh and alert, but by 3pm I was pretty much disheveled.

Here's my 1 cup brewed coffee, for the sauce.

Spices for barbeque sauce.

Yay for my wonderful new vintage prep bowls.

I like this prep bowl too. It's Fire-King, one of my very favorite retro brands. It's holding ketchup, vinegar, lemon juice, worcestershire, and a minced chipotle chile for the barbeque sauce.

Here's the meat.
   
It cooked for 6 hours.

Coffee-Chipotle Barbeque Sauce

This sauce is good! I half-way thought it was going to be gross for some reason, but it was like my favorite part of dinner. {It's got a kick to it.}

~

Coffee-Chipotle Oven Brisket
from The Homesick Texan Cookbook by Lisa Fain

1 teaspoon kosher salt
2 teaspoons black pepper
2 teaspoons chipotle powder
1 teaspoon mustard powder
1 teaspoon ground cumin
1 3- or 4-pound brisket, the flat cut, preferably with a bit of fat still on it
4 slices of bacon
1/2 medium yellow onion, cut into slivers
4 cloves garlic, cut in half
1 cup Coffee-Chipotle Barbeque Sauce (recipe follows)

Preheat the oven to 325° and line a baking sheet with foil.

Mix together the salt, black pepper, chipotle powder, mustard powder, and cumin. Rub both sides of the brisket with the spices. Place brisket on a large sheet of foil, fat side down, and top it with the bacon, onion slivers, and garlic. Wrap the brisket tightly in the foil, and then wrap it with another piece of foil to ensure that no juices leak out. Place foil-wrapped brisket on foil-lined baking sheet (bacon side up) and cook it for 6 hours.

After 6 hours, remove the brisket from the oven and let it sit in the foil for 20 minutes. After it's rested, open up the foil (be careful, as very hot steam will escape) and remove the brisket from the foil. Add 1 tablespoon of the brisket juices to your barbecue sauce.

To serve, take off the bacon, onions, and garlic from the brisket and cut slices against the grain. Serve with the barbecue sauce on the side. If you want a bit of a crust, place the brisket under the broiler 5 minutes before serving.

Yield: 6 to 8 servings

Coffee-Chipotle Barbeque Sauce 

1 tablespoon bacon grease or vegetable oil {use bacon grease, it's fantastic!}
1/4 medium yellow onion, diced
2 cloves garlic, minced
1 or 2 canned chipotle chiles in adobo, minced
1/2 cup ketchup
1/4 cup tomato paste
1/4 cup apple cider vinegar
2 tablespoons lemon juice
1/4 cup molasses
1 tablespoon Worcestershire sauce
1 cup brewed coffee
1/2 tablespoon black pepper
1 teaspoon dry mustard powder
Pinch of ground nutmeg
Pinch of ground clove
1 teaspoon smoked paprika
Salt, to taste

Heat the bacon grease in a sauce pot on medium and cook the onion for 10 minutes or until translucent. Add the garlic and cook for another minute.

Stir into the pot the chipotle chile, ketchup, tomato paste, vinegar, lemon juice, molasses, Worcestershire sauce, coffee, black pepper, mustard powder, nutmeg, clove, and smoked paprika. Turn down the heat to low and cook for 30 minutes, stirring occasionally. Add salt to taste. If it's too thick, add a bit of water to make it thinner. Will keep for 1 month in the refrigerator. 

Yield: 2 cups

Tuesday, March 6, 2012

How to Dredge Without Making a Big Mess

Last night I was making Almond-Crusted Chicken Tenders, and it occurred to me that I should do a blog post explaining my special dredging technique. 


I don't use my hands, because that can get icky fast. So can using tongs. Unless you use two pairs of tongs: one pair that touches the wet stuff, and one pair that touches the dry stuff. 

First, using the "wet tongs", I pick up a piece of meat (in this case, a chicken tender). I dunk the chicken tender into the wet stuff (in this case, egg). Then, still using the wet tongs, I transfer the chicken to a pie plate full of the dry stuff (in this case, a mixture of ground almonds, a little flour, some spices, and a tiny bit of olive oil). As I'm transferring, I make sure not to let the wet tongs touch any of the dry stuff. Then I set the wet tongs aside. Next, I take a medium spoon and use it to pile a bunch of the dry stuff on top of the chicken tender. Then I pat it down, turn it around, and basically do all of the dry dredging with the spoon. Then, I take my "dry tongs" and use them to pick up the meat, shake off the excess, and transfer that bad boy to wherever it's going. (A holding area, or in this case, a metal rack coated with cooking spray.) 

And there you have it! All of your utensils stay clean and in working order (rather than accumulating that annoying dredgy build-up).

Dredging station.


Be sure to use metal tongs. They are much easier to use than tongs that are coated in plastic or whatever.


Anyway, this recipe is great. My mom discovered it, of course. 
{She has a very special knack for discovering good recipes.}

I like to serve these tenders with honey mustard dipping sauce.


I just put some honey and some spicy brown mustard in a bowl and whisk them together.

~

Recipe Notes:
  • Use 2 eggs instead of 4 egg whites. In this case, using egg whites only would be a waste of eggs.
  • I like to make the breading (dry stuff) times 1.5, because it doesn't really make enough otherwise. If you make it as written, you'll have enough breading to cover 6 tenders, 7 tops.

Tuesday, February 28, 2012

Culinary Capers Ingredient of the Week: Poppy Seeds

Today was a very special day because I turned 28 on the 28th. And later this year (in June), Josh will turn 29 on the 29th!

Anyway, this week is not only my birthday week. It's my first week to pick the ingredient for Culinary Capers! I chose poppy seeds, and I did a fruity salad with homemade poppy seed dressing.


Success!

This fruity, nutty, sweet and salty salad is almost better than birthday cake. {It's definitely better for your arteries.} I don't like to eat strawberries/blueberries/any berries plain, because they're not sweet enough. But this sweet poppy seed dressing makes them go down easy. And a little bit of it goes a long way.


This recipe for poppy seed dressing is totally easy to make. And for the salad I used:

  • red-leaf lettuce
  • baby spinach
  • fresh strawberries
  • fresh blueberries
  • salted pistachios, chopped

The first time I made this salad I used honey-roasted almonds, and the result was too much sweetness. The salted pistachios suited my taste more because they cut the sweetness of the dressing. Also with the second salad, I made sure to be more generous with the fruit and less generous with the dressing. {And perfection was achieved.}

Tuesday, January 31, 2012

Toast Post

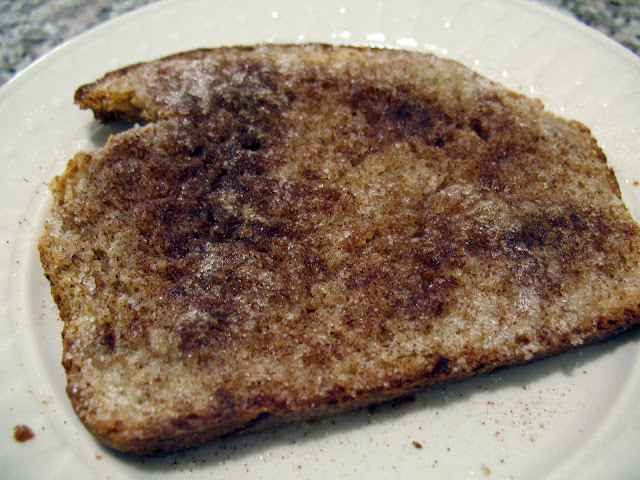
Cinnamon toast is great. Especially on homemade bread.


 I made this whole wheat country crust bread using the special whole wheat-ifying technique I mentioned a few posts ago. It's good. It might be the tastiest loaf of bread I've made. (Not that I've made a whole lotta bread.) Anyways... In case you didn't know:

{ how to make cinnamon toast }
1. Spread some butter on some bread. 
2. Sprinkle on some cinnamon, sprinkle on some sugar, and don't be stingy with either. 
3. Toast in a 350˚ oven for 10 minutes.

Thursday, January 19, 2012

Nativities and Creamy Pasta Bliss

I had fun taking down my Christmas decorations today. 

 I love this little nativity. Grandma Forga had one just like it when I was growing up, and I believe she had it when my mom was growing up as well. I was excited to find one for 25¢ at a thrift shop down the road.

Grandma Forga did this Christmas painting for me. Grandma has been quite a prolific painter since her move to the assisted living; but I am proud to have her one and only sparkly painting. Mom brought me the colorful tin nativity from her last trip to Santa Fe. 


It came with a pretty tin box.


Then I made one of my favorite recipes: creamy tomato-basil pasta with shrimp.


{ Those are stuffed mushrooms. }

This was the richest meal ever!!! It didn't hit me that this meal was going to be totally inappropriately rich until it was like almost done and there was no time to fool with making a salad to go with it. I told Josh to just pretend like he was a medieval king. 

Here's the recipe for the pasta (it is killer):

Creamy Tomato-Basil Pasta with Shrimp
adapted from kraftrecipes.com

2 Tablespoons olive oil
1 cup red onion, thinly sliced
1 cup grape tomatoes, halved
10 ounces uncooked medium shrimp, peeled and deveined
1/4 cup Kraft sun dried tomato vinaigrette
3/4 cup chicken broth
2 teaspoons garlic salt
4 ounces cream cheese
8 ounces farfalle (bow-tie) pasta, dry
1 cup (100 grams) freshly grated parmesan
cracked pepper to taste
8 fresh basil leaves, cut into strips
Additional basil leaves for garnish, if desired


  • Cook pasta according to package directions. Heat olive oil in large skillet over medium-high heat. Add tomatoes and sautee until browned, 5 to 10 mintues. Add red onions; cook and stir for about a minute. Add shrimp; cook and stir until done, about 4 minutes. Remove vegetables and shrimp from skillet. 
  • Add vinaigrette, broth, and garlic salt to skillet; cook 2 minutes or until heated through. Add cream cheese; cook and stir 2 or 3 min or until melted. Add cooked pasta to skillet along with shrimp & vegetables, parmesan, and cracked pepper. 
  • Turn heat to low. Cook, stirring frequently, until sauce has reached desired thickness, 10 minutes or less. Remove from heat and stir in basil strips. Garnish with additional basil if desired.

Yield: 4-6 servings
Calorie content: 1 cup (165 grams) = 300 calories
Note: On the page I've linked to for the original recipe, there's a great explanation of how to slice basil into lovely chiffonade strips. 

Sunday, January 15, 2012

Inspired by the Candy Tree

To make a candy tree-inspired treat, you will need 1 leftover "ornament" and a kitchen hammer thing.


Smash up your candy cane.

And sprinkle it atop 1 serving (1/2 cup, 70 grams) of vanilla ice cream, for a very good 155-calorie treat.


This beats the 650-calorie peppermint milkshake from Chik-fil-A.


Sunday, January 8, 2012

Drop Biscuits

This recipe is a gem because it's so easy, so convenient, and so impressive.


I mean, aren't you impressed? By easy I mean you get all the glory of homemade biscuits from scratch, without the hassle of rolling or cutting. By convenient I mean they freeze beautifully. I popped these two out of the freezer and baked them all by themselves. Just for me. I like them with honey or grape jelly. 

Drop Biscuits
(adapted from The Better Homes & Gardens New Cookbook)

Ingredients
  • 3 cups all-purpose flour
  • 4 teaspoons baking powder
  • 1 Tablespoon sugar
  • 1 teaspoon salt
  • 3/4 teaspoon cream of tartar
  • 3/4 cup cold butter
  • 1 1/4 cups buttermilk (or 1 cup milk)
  • 1/4 cup whipping cream
Prep
  • In a large bowl stir together the flour, baking powder, sugar, salt, and cream of tartar. Using a pastry blender, cut in butter until mixture resembles coarse crumbs. Make a well in the center of the flour mixture. Add buttermilk and whipping cream all at once. Using a fork, stir just until moistened.
  • Drop dough by spoonfuls onto a parchment paper lined baking sheet. (You have to use the parchment paper or they won't do right.) Bake in a 450° oven for 10 to 12 minutes or until golden. Remove biscuits from baking sheet and serve immediately.
~
If freezing, freeze the dropped dough overnight on a baking sheet covered with plastic wrap. Then, transfer the frozen biscuits to a plastic freezer bag the next day. Increase bake time to 15 minutes (or until golden) for frozen biscuits.

The original recipe says it makes 12 biscuits, but I make mine small, so it's more like 24. One of my small biscuits is approximately 150 calories.

Thursday, December 29, 2011

Salad Season

Tis the season to lose all that F-in' weight. To that end I'm eating salad. Eating salad doesn't have to be lame, it can be fun! Here is a combination I've been perfecting for the last few days. It's a hybrid of a magazine recipe and my memory of a salad that used to be on the menu at Outback. It's 290 calories, and really yummy. So yummy that I only require 3 Ritz crackers to get it down, not my usual 5.


Here's the formula:
  • a pretty big but not huge bed of romaine or red-leaf or whatever you like
  • 1 whole green onion, thinly sliced
  • 2 1/2 ounces turkey (I like mesquite smoked from the deli counter sliced thick)
  • 5 artichoke hearts, chopped
  • 10 grams of feta, crumbled (bleu cheese would be great too)
  • 6 candied almonds, chopped
  • 2 Tablespoons (32 grams) Kraft raspberry vinaigrette with poppyseeds

The raspberry vinaigrette makes it really special. (Thanks Lucy for putting that on my brain.) Candied pecans would be better, but I recently inherited a vast quantity of candied almonds.

Saturday, July 16, 2011

Perfect Squash Casserole

This might be my favorite "southern food" recipe. 


I made this dish for the Vines family reunion one year, and it was GONE!

Squash Casserole
(from "Taste of the South" magazine)

Ingredients

12 cups (4 lbs) yellow squash, sliced {the summer kind}
1 cup onion, chopped
2/3 cup salted butter, divided
1 1/2 Tablespoons sugar
1 teaspoon salt
1/2 teaspoon black pepper
2 eggs, beaten
1 sleeve Ritz crackers, crushed

Prep

  • Preheat oven to 350°. In a large pot over high heat boil squash in enough water to cover until fork-tender, approximately 10 minutes. Remove from heat, drain well. Return to pot.
  • In a small skillet over medium heat saute onion in 1/3 cup butter until onion is translucent. Pour over squash.
  • Add sugar, salt, pepper, and egg to squash. Stir gently to combine.
  • Pour mixture into lightly greased 9x13 baking dish. Top with crushed crackers. Melt remaining 1/3 cup butter and drizzle over crushed crackers. Bake 1 hour or until golden brown.
  • Serves 12-16. {I happen to think it serves more like 8.}
  • 1/8 of recipe = 270 calories

IMPORTANT TIPS:

  • It is important to drain the squash very well before adding it back to the pot, so that you don't dilute the deliciousness with excess water. What I do is pour the cooked squash into a colander, and then just let it sit there for half an hour or more, pressing it with a fork every so often. That way, a lot of the water will simply evaporate away.
  • This dish does not keep particularly well (the Ritz cracker crust turns soggy in the fridge), so make half the recipe if you are cooking for 3-4 or less. I like to use an 8x8 glass baking dish when I make a half-batch.


Monday, December 13, 2010

Chili: The Family Recipe

This is a very special recipe for chili. It's actually the only chili I've ever made. My mom found this recipe years ago (not sure where) and has been making it ever since. I've been making it for quite a while as well. It's so good, and it's very healthy because of the huge quantity of vegetables that goes into it. Trust me, by the time it's done simmering, you'll know you're onto something good!

The recipe makes roughly 10 cups (a lot, in other words).

Chili (The Special Buys Soon-to-be-Ledbetter Family Recipe)

Ingredients

1 lb ground beef
cooking oil
2 onions, chopped
1 green bell pepper, chopped
3 carrots, chopped
2 stalks celery, chopped
2 cloves garlic, minced
2-3 tablespoons chili powder
1 teaspoon cumin
1 can pinto beans, drained and rinsed
1 can black beans, drained and rinsed
1 can white corn, drained and rinsed
2 cans diced tomatoes, undrained (I vastly prefer the petite cut tomatoes.)
2 tablespoons tomato paste
2 cups chicken broth
salt & pepper to taste (I use 1 1/2 or 2 teaspoons salt, can't remember which, and no pepper.)

Prep

Brown the ground beef in a large pot. (I use my big 8-qt pot. You'll need something bigger than a 3-qt) Remove beef from pot; drain and set aside. Heat oil (1 or 2 tablespoons) in pot and add onions, pepper, carrots and celery; sautee until tender. Add beef and all remaining ingredients to the pot and simmer 30-45 minutes. If chili reduces too far, additional chicken broth may be added to achieve desired consistency.

THE END

If you're a busy working gal (or guy), you could make up a batch of this over the weekend, then take some for lunch to heat up throughout the week. Unless you're on a serious diet, you need to dress this up with some shredded cheese and saltine crackers. And if you're seriously NOT on a diet, shredded cheese and Fritos (the most calorie-dense food known to man). If I'm eating 1 cup of chili (230 calories), I use 1/4 cup of shredded cheddar (110 calories) and 6 crackers (70 calories). 410 calories. (I find it helpful to know how many calories I'm eating.)

By the time I got around to taking a picture of my chili, it was almost gone. This is the last little bit I packed up for Josh's lunch this morning.


Tuesday, November 30, 2010

Oh the Dredgery

Just a couple of things I've dredged up so far this week...


First: Deer Stew. For the deer stew I used the same recipe I normally use to make beef stew. Here is the recipe (taken from my trusty Better Homes and Gardens New Cookbook), with my modifications in parentheses.

Old-Fashioned Beef (Deer) Stew

Ingredients

2 tablespoons all-purpose flour (I use more)
12 ounces beef (deer) stew meat, cut into 3/4-inch cubes
2 tablespoons cooking oil
3 cups vegetable juice
1 cup water
1 medium onion, cut into thin wedges
1 tablespoon Worcestershire sauce
1 1/2 teaspoons instant beef bouillon granules (I use 2 beef bouillon cubes)
1 teaspoon dried oregano, crushed (I use 1/2 teaspoon)
1/2 teaspoon dried marjoram, crushed
1/4 teaspoon black pepper
1 bay leaf
(2 1/2 teaspoons salt)
3 cups cubed potatoes


1 1/2 cups frozen cut green beans
1 cup frozen whole kernel corn
1 cup sliced carrots

Prep

Place flour in a plastic bag. Add meat cubes, a few at a time, shaking to coat. In a large saucepan or Dutch oven brown meat in hot oil; drain fat. (I don't drain the fat.) Stir in vegetable juice, water, onion, Worcestershire sauce, bouillon granules, oregano, marjoram, (salt), pepper, and bay leaf. Bring to boiling; reduce heat. Simmer, covered for 1 to 1 1/4 hours or until meat is nearly tender.

Stir in potatoes, green beans, corn, and carrots. Return to boiling; reduce heat. Simmer, covered, about 30 minutes more or until meat and vegetables are tender. Discard bay leaf.

Tip: When I'm getting my ingredients together to make something, I like to measure out all of the spices/seasonings into a shot glass. It's the perfect size!


Here's Josh digging in. He's not waiting for me to take a picture.


You absolutely have to eat this stew with crumbled up cornbread. I think you do anyway. I mean, why would you not?


Here's the cornbread I made. We had this on Thanksgiving also. It's got jalapenos in it. Classic Buttermilk Cornbread. Click on the link, and give it a try the next time you are making cornbread. It's a very special recipe that gives you a nice crusty crust. And don't even think about using anything other than a cast-iron skillet.


Anyway, this stew is healthy because it contains lots of vegetables; some fresh, some frozen. One cup of this stew has about 235 calories, and if you cut the cornbread into 12 pieces, each piece has about 140 calories. That's 375 calories, and those are my recommended portion sizes. Not bad for a hearty lunch!

Next: Eggplant Parmesan


So I had never made this before, but Josh's dad brought us two white eggplants from his garden. They were SO adorable!!! I really should have taken a picture of them before I cut them up. Anyway, this is what I did with them, and it turned out so good! Once again, the recipe is from the BHG book.

Eggplant Parmigiana

Ingredients

1 small eggplant (12 ounces) (I used two VERY small eggplants that approximately equaled that weight.)
1 beaten egg
1/4 cup all-purpose flour (I used way more, and I added salt and pepper to my flour.)
2 tablespoons cooking oil (I used like 4 tablespoons of olive oil.)
1/3 cup shredded Parmesan cheese
1 cup meatless spaghetti sauce (I use Newman's Own marinara.)
3/4 cup shredded mozzarella cheese (3 ounces)

Prep

Wash and peel eggplant (I didn't peel mine); cut crosswise into 1/2-inch slices. Combine egg and 1 tablespoon water; dip eggplant slices into egg mixture, then into flour, turning to coat both sides. In a large skillet cook eggplant, half at a time (all of mine fit in at once), in hot oil 4 to 6 minutes or until golden, turning once. Add additional oil if necessary. Drain on paper towels. (It took me longer than 6 minutes to get a nice brown color.)


Place the eggplant slices in a single layer in a 2-quart rectangular baking dish. If necessary, cut slices to fit. Sprinkle with Parmesan cheese. Top with the spaghetti sauce and the mozzarella cheese. Bake in a 400 degree oven for 10 to 12 minutes or until heated through. (It took mine longer than 12 minutes. I turned the oven up 25 degrees at the end to get the cheese to turn brown like I wanted it to.)


Now this was good stuff!


I estimate that each of these little guys has about 100 calories. (Of course it would be different if you used a different size eggplant.)